
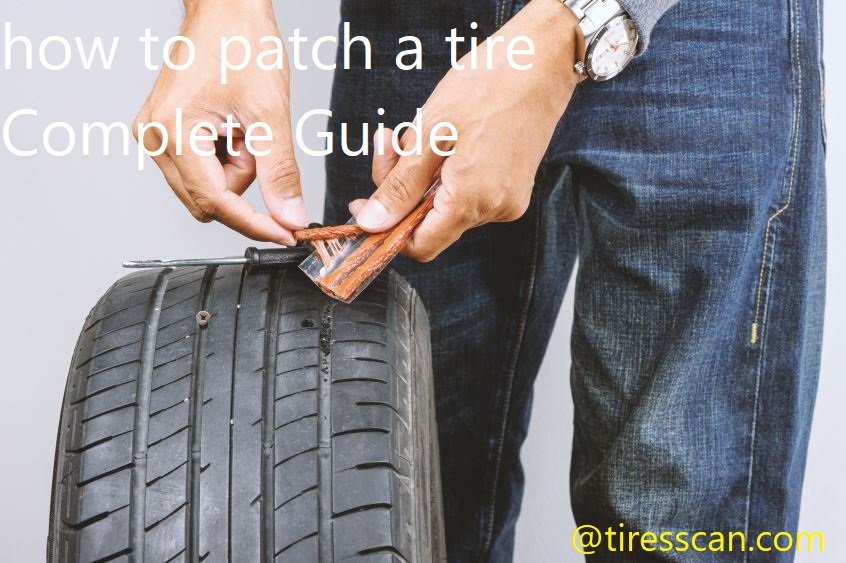
Are you getting frustrated trying to patch your tire? Don’t worry, you’re not alone. This guide is designed to help you get back on the road as quickly and safely as possible. You’ll learn everything you need to know about patching a tire, from assessing the damage to actually performing the repair. Let’s get started!
The first step to efficiently patching a tire is understanding the anatomy of the issue. Knowing the common signs and patterns of structural damage, materials to use, and safe procedures will help you patch a tire quickly and easily. A good patch job can help increase the life expectancy of your tire, making it more cost-effective in the long run.
This guide provides information on how to inspect a tire for damage, choose the right materials for repair, and apply an effective patch. By following this guide in full, you will be able to properly fix any issues with your tires, so you can drive safely on the road again knowing all problems have been taken care of.
Briefly introduce the topic of patching a tire
When you find yourself faced with a punctured tire, patching it is often the best option for getting back out on the road. In this guide, we will explore how to patch a tire in order to quickly and safely repair it and get you back on your way!
We will cover topics such as required materials, analyzing the puncture size and shape, prepping the tire for patching, applying adhesive properly, inserting patches correctly and ultimately finishing up with proper inflation procedures. With this information, you can easily patch any holes in your tires!

Importance of knowing how to patch a tire
Knowing how to patch a tire correctly is an essential skill for every driver. Apart from saving money, you will also ensure that your vehicle always runs safely on the roads. It is important to understand the process of patching a tire before attempting it on your own. Making sure that the right tools and materials are used in the repair job is the most crucial step in this process.
Patched tires should always be checked with a pressure gauge before taking them out on roads to make sure they are safe for riding. It is equally necessary to check whether there are any stones or dirt present which could cause further damage when driving at higher speeds or carrying heavier loads. Checking for cracks or side bulge of the tire wall and inspecting each patched area diligently is also important for ensuring road safety in all weather conditions.
It is best to turn to professionals whenever possible but being familiar with the patching process can go a long way in making sure that you don’t get stuck on roads due to flat tires. Therefore, learning how to patch tires correctly deserves its place among basic motor vehicle skills which every driver must possess for safety reasons apart from financial savings.
Materials Required
Before you start, make sure that you have the right materials available to you. Below is a list of the materials that will be needed to patch a tire:
- Tire repair kit or patch kit
- Air pump (manual or electric)
- Rags
- Lug wrench or flathead screwdriver
- Pliers
- Water jug (or similar container)
- Soap/detergent and water solution
In addition to these items, it’s a good idea to have a spare tire handy in case any unforeseen circumstances arise during the patching process. Be sure to check your vehicle manual for any additional tools that may be needed before proceeding.
List of tools and materials needed for patching a tire
Before you begin the process of patching your tire, it is important to make sure you have all the necessary tools and materials. Without these, the process will take much longer and can be frustrating. To start, make sure you have the following items:
Tools: -Safety glasses -Tire lever -Hand tool to remove staples and nails from old patch (if needed) -Air pump or compressor for inflating tire after repairing. -Metal rasp or fine grit sandpaper for roughening up surface of tire before adhering new patch (optional).
Materials: -Tire repair kit with patches, glue/cement, and valve stem core remover (most kits come with all of these items included). -“Tuber” of rubber cement material designed specifically for tire repair
Once you have all these items together, you can begin working on patching your tire. Make sure to read any safety instructions that come along with your kit before beginning any repair job!
Identifying the Leak
Identifying the source and type of tire leak is essential before you start any repairs. While many tire leaks can be repaired with a patch, some punctures can cause too much damage to the casing, requiring that the tire be replaced.
To identify the leak:
- Inflate your tire so it is at its normal pressure. If your tire was previously flat, fill it to its recommended air pressure, as indicated on its sidewall. Listen carefully for leaking air and confirm with a hand-held pressure gauge to determine if your tire has been properly filled with enough air;
- Before searching further for a puncture, check the valve core for leaks by removing it from the valve stem using an adjustable wrench or pliers; and
- Use a soap-and-water solution and brush to coat portions of the sidewall and tread areas, look for bubbling foam that will indicate where the puncture is located on your tire.
Steps to identify where the tire is leaking from
The first step in patching a tire is to identify where the tire is leaking from. This can often be a difficult job, and can require some additional tools to help make the process easier. Before beginning, you should check the outside of the tire for any obvious signs of damage such as cracks or punctures. If any holes or cuts are visible, it’s likely that these are causing the tire to leak.
Once any visible damage has been identified and checked, you may need to use a plug kit or similar tool to help you get access to the source of the leak. Start by removing any air that is in the tire and peel back a section of tread with a specialized layer separating tool. Use this tool along with an inspection mirror (or similar device) to get underneath the tread and inspect for punctures, gashes or other types of damage that may be causing your tire to leak.
Another method to help you find out where your tire is leaking from is by submerging it in water. Fill up a deep bowl with water and submerge your entire wheel inside it – If there are any leaks coming from either valve stem or bead area of your wheel, then bubbles should begin forming on its surface within minutes; This will help you pinpoint where exactly your tyre is leaking from so that you can take action accordingly!

Different types of leaks and how to identify them
There are different types of leaks that can occur in a tire and it is important to understand how to identify each one. Below is a breakdown of the different types of tire leaks and how you can diagnose them.
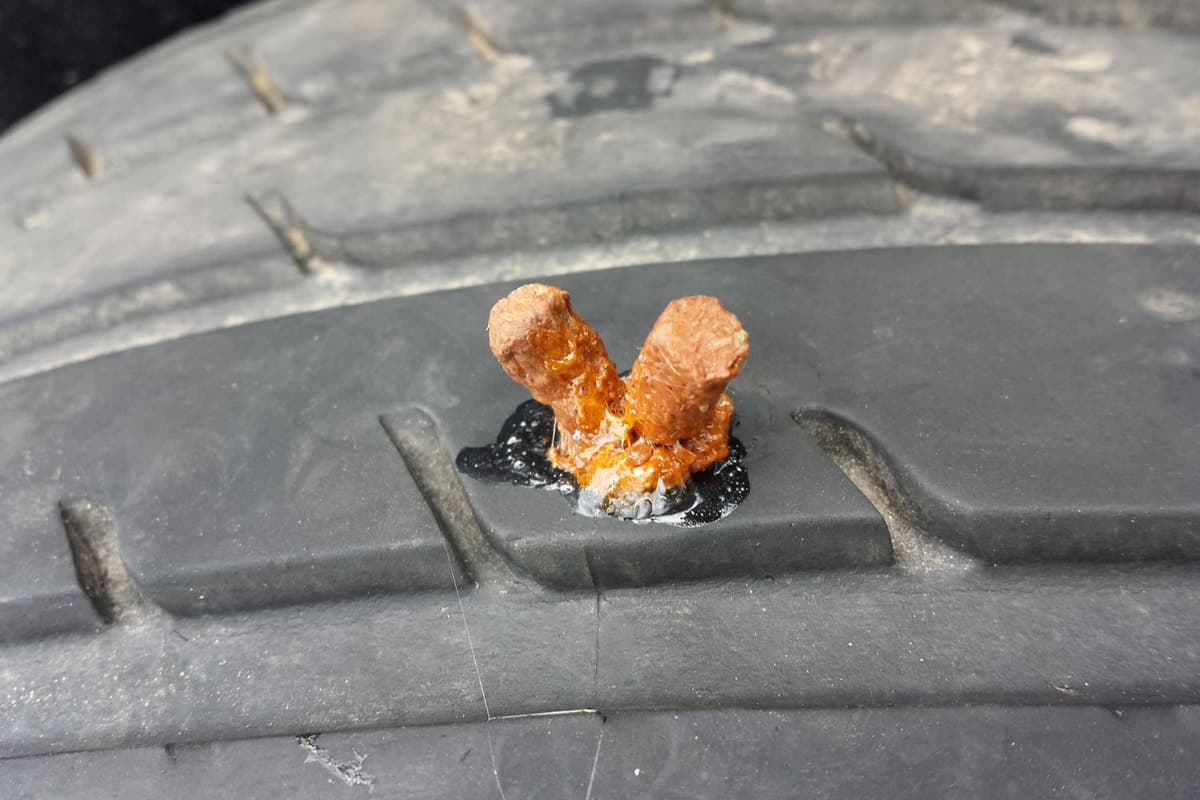
Punctures: Punctures are the most common type of leak, caused by sharp objects or nails that penetrate the treads and sidewalls of the tire. To determine if your tire has a puncture, carefully check the treads and sidewalls for any foreign objects on the surface. If you find an object embedded in your tire, take it to a mechanic to safely remove it and patch up the hole left behind.
Gashes: Gashes are caused by cuts from road debris such as stones or pieces of debris from other vehicles. These cuts often leave behind deep grooves in the rubber on your tires, which should be treated immediately as they can cause significant damage if ignored. Again, take your vehicle to a mechanic who will patch up any gash in the rubber with specialized materials designed for patching up tires.
Leaks Around Valve Stems: Leaks around valve stems may not be easy to detect at first glance but they can lead to slow air loss if unchecked. Such leaks usually occur when valves are left open too long or when valve caps become unscrewed due to impact. To check for this type of leak, simply close off all valve stems on your tires and cover each one with soapy water—if any bubbles appear around one or multiple valve stems, then you have likely identified a leaky valve stem that needs replacing or readjusting immediately.
Preparing the Tire for Patching
Before applying the patch to the tire, it’s important that you properly prepare the tire for patching. This involves cleaning and preparing the back side of the puncture surface area and making sure that it is smooth and free of any dirt or debris.
First, remove any large pieces of debris from the puncture using a pair of needle-nose pliers. Then, using a sharp utility knife, carefully remove any remaining pieces of rubber near the puncture site. Make sure to not cut into any undamaged rubber surfaces — this may weaken the integrity of the tire itself. Once all visible debris is removed, use an abrasive sandpaper—like 320 grit sandpaper—to lightly sand down around the edges of the puncture so that they’re smooth and even with the rest of the tire surface.
After this step is complete, wipe down around area with a slightly damp cloth to remove any dust created from sanding. You can also use rubbing alcohol in a spray bottle to do this instead and make sure all residue has been removed before patching your tire.
Steps to remove the tire from the rim
Removing the tire from the rim can be a tricky process, so it’s important to take your time and focus on each step. Safety is of paramount importance when making any repairs on a bike tire, so make sure you wear gloves and safety goggles for protection.
To remove the tire from the rim, begin by releasing all of the air pressure in the tube – this can be done by pressing down firmly on the stem cap and using either a valve wrench or your thumb to open up the stem. Once it is fully deflated, use an adjustable wrench or bike lever to carefully release each bead of your tire by gently alternating between both sides until they are loose enough to pull outwards.
Next, move onto the inside bead of your tire and repeat this same process until both beads are totally separated from one another. If necessary, use a flathead screwdriver to help you spread them apart without damaging them.
Once both beads are successfully removed from their respective spots on either side of your rim, make sure that you inspect them for any possible debris or damage that might have occurred during deflation or separation – clean away any dirt with mild soap and hot water if need be before re-installing.
Preparing the tire for patching
Before you begin the patching process, it is important to make sure that your tire is properly prepared. If there are any loose pieces of rubber or debris in the area that needs to be patched, they must be removed before the patch can be applied. Carefully check your tire for cracks or cuts that may need to be plugged or patched as well.
Next, use a metallic brush to clean and roughen up the area around the puncture on both sides of the tire. This will provide a better bonding surface for the patch adhesive. Use soapy water and a rag to wipe away any dirt, grime, and loose rubber particles from around the holes; if you don’t do this step correctly, your patch won’t adhere properly and could potentially leak air. Make sure not to damage any of the cords in your tire during this step; otherwise, replacement may be necessary instead of patching.
Conclusion
In conclusion, repairing a tire is an easy job that can be done with minimal tools and minimal expense. The process is relatively straightforward and can be completed in just a few steps. Before beginning any repair work on your vehicle, it is important to read through the instructions carefully and double-check the equipment you will need to make sure you have everything needed before starting. As this process is familiar to most people, it should not take too long to complete.
Remember, when handling any tire repairs, always take all necessary safety precautions and never attempt to do anything beyond your own capabilities or experience levels. If in doubt about anything at all, it’s recommended that you speak to a professional for assistance instead of risking an injury or making costly mistakes.
FAQs
Can you patch a tire by yourself?
Yes, it is possible to patch a tire by yourself using a tire repair kit.
How long can you drive on a patched tire?
The maximum safe driving distance on a patched tire may vary, but it is generally recommended to have the tire repaired or replaced as soon as possible.
Is it better to patch a tire or plug it?
Both tire patching and plugging can be effective methods of repairing a tire, but patching is typically considered to be a more permanent solution.
Is it OK to just patch a tire?
Yes, patching a tire can be an effective way to repair it and avoid the need for a full replacement.
Do you need cement to patch a tire?
Yes, tire patches typically require the use of special adhesive cement to bond the patch to the tire.
Can I patch a tire with a nail in it?
Yes, a tire can often be patched if it has been punctured by a nail, as long as the puncture is not too large and the tire has not sustained other damage.
Are patched tires safe at high speeds?
If the tire has been properly repaired, it should be safe to drive at high speeds. However, it is important to have the tire inspected and repaired by a professional to ensure that it is safe for use.
When should you not patch a tire?
A tire should not be patched if it has sustained damage that is too severe or extensive, or if the tire is too old or worn.
How long does a tire patch cost?
The cost of a tire patch can vary depending on the size of the tire and the extent of the damage, but it is typically less expensive than a full replacement.
Are tire plugs permanent?
Tire plugs are considered to be a temporary solution and may not provide a permanent fix for a damaged tire. However, they can be effective in certain situations and can help to extend the life of a tire.
See Also:
- Best Tires For Chevy Equinox
- Best Tires For Camaro Ss
- Best Tires For Gravel Roads
- Best Tires For C5 Corvette
- Best Tires For Audi Q7